Showing posts with label diy. Show all posts

Monday, August 26, 2013

Foraging

I've aways been interested in foraging edible weeds and living off the land. This year I discovered that our neighbor has an elderberry bush. Excitement! Elderberries are amazing in so many different ways--the berries as well as the flowers.

I've picked a few and had grand plans to make jelly, but there's no way I'm going to come up with the huge amount of berries needed, so I'm going to make elderberry syrup, which is a cold/flu preventative and treatment for those illnesses.  The syrup is taken daily (1tsp for kids, up to 1 tablespoon for adults) for prevention and every 2-3hrs for flu symptoms. 

Combined with the Master Tonic languishing in my cabinet, the elderberry syrup will significantly add to the natural medicines available for my family. 

Pictures and tutorial soon!

Wednesday, January 18, 2012

Finally!

Yes, we are finally finishing up the painting downstairs in the dining room and entryway. Yes, it's amazing. And next week we'll be finishing the bathroom! Wait, maybe I shouldn't say that.... For awhile we've been searching for the 'perfect' mirror for the bathroom. Meanwhile, a small mirror from Target propped up in the window has been the only mirror. Nice, huh?

And those shutters are also going. A nice idea, but I've hit my head way too many times on them to like them. When folded they take up a lot of room. Yeah, that's a phone on the wall there, too, in reach of the toilet. As if. That is destined for the kids' toybox for sure. Maybe even today.

I'll post pics of the diningroom/entryway later, cause while it won't take long to finish the painting, it's going to take a lot of effort to get all the crap sorted and put away. Yes, I know I wait too long to do things like that.

Here's the bathroom wall, waiting for a mirror and lights, which we do have.

It will be nice to have these two projects crossed off so I can move on to the boys' room next.

Tuesday, October 11, 2011

DIY Cinnamon Scented Pine Cones

Nothing says Autumn more than cinnamon and spice, and what better way to project that than with cinnamon pine cones? (we'll just ignore the fact that it's 80 degrees today; it's October, that's what counts.)  While searching the internet for a way to make the pine cones, I came across two main recipes: the first, no doubt the longest lasting, takes 8 weeks and uses cinnamon oil rather than powder. The second, which I'm sharing here, is the quick version. Since I have an abundance of pine cones in my yard, my only expense was pickling spice, which I picked up at Meijer  for around $3.49. I already had plenty of ground cinnamon, cloves and spray adhesive. So if you have to purchase any of those items, the cost will be a bit more.

Cinnamon Pine Cones

*assorted pine cones, about 8-10 per batch, deciding on the size. Mine were the long, skinny type.
*1/4 cup pickling spice
*1/4 cup ground cinnamon
*1/4cup whole cloves or 1/8cup ground cloves
*spray adhesive
*trash bag


1. mix spices together
2. put the pine cones in the bottom of the trash bag in a single layer.
3. Spray the adhesive directly on the pine cones, taking care not to breathe in the fumes. Quickly close the bag with your ands and shake vigorously to turn the cones over.
4. Open the bag, allowing pine cones to settle into a single layer again, and respray with the glue.
5. Empty the spices over the pine cones, close bag and shake again to distribute.
6. Dump the pine cones out onto newspaper and allow to dry.

Sunday, October 10, 2010

I'm a DIY kind of gal

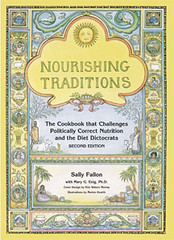
nourishing traditionsImage by NourishingCook via Flickr
Yup. Been missing in action. Did ya miss me? Didnt think so. It's gotten pretty crazy around here in the kitchen. First off, Dyno Dad scored a promotion--Yay for DD! So we are finally leaving The 'Burg!  I think we all have mixed feelings about that, as the new job is in Chicago. Yep. North to Alaska--ok, not really, but I think it's gonna feel like Alaska this winter.....

I've been having fun in the kitchen with my new cookbook Nourishing Traditions by Sally Fallon, a b-day gift from my big sis.  I've been experiementing with lacto-fermented foods. Most people's experience with fermented food is has been limited to saurkraut.  Therre's a whole world beyond simply saurkraut. Not to mention that thse types of foods are insanely good for your gut.  So I've made Fermented Bean Paste (called Bean Dip for obvious reasons), and after three days on the counter K and I tried it---tasty! Garlicky and made us wish for a bag of tortilla chips. Mmmm.  Due to be transferred tot he top shelf of the fridge are two pints of Garlic Carrots.

I also made cream cheese! I am serious, people. All it took was to drain a carton of plain yogurt in a cloth lined colander until all the whey dripped out.  Ta Da!   Cream cheese identical in taste to the stuff in the box, I kid you not. It's just a little softer than  the commercial stuff. Guess who won't be buying cream cheese in a box any more?

I'm a DIY Girl.
Enhanced by Zemanta